If you want to unlock bootloader, install custom recovery, root your android device or flash a custom ROM on your device, you’re bound to encounter the terms such as ADB, ADB Drivers and Fastboot. In this guide we’ll talk about What is ADB and Fastboot? How to install ADB drivers and finally how to setup and use ADB and Fastboot for Android on your Windows and Mac OS X operating systems.
What is ADB?
ADB stands for Android Debug Bridge and it is a command-line utility included with Google’s Android SDK. ADB provides you terminal/command-line based interface to communicate/control your Linux based Android device over a USB connection from your computer. You can use ADB to run shell commands, transfer files back and forth, install and uninstall apps, reboot, reboot into recovery, reboot into bootloader and more. Using ADB, you can even backup and restore your Android phone/tablet. ADB comes as a part of the platform-tools in Android SDK (Software Development Kit). ADB allows developers to tinker with internal components of the Android OS that not not available to the user otherwise.
What is Fastboot?
Fastboot is a new term that has joined in the ADB. Fastboot is a special diagnostic and engineering protocol that you can boot your Android device into. While in fastboot mode, you can directly flash the file system, unsigned partition images in your Android device over a USB connections. Not all the Android phones/tablets have the Fastboot mode. Nexus device comes with fastboot by default as well as some other new devices from other brands.
Now that we have discussed what is ADB and Fastboot, here’s a quick and easy to follow guide to install ADB drivers, setup ADB and fastboot on both Windows and OS X for your Android devices. We’ll discuss things in the following order:
- How to Install ADB Drivers
- How to Setup ADB & Fastboot for Windows
- How to Setup ADB & Fastboot for Mac
How to install ADB Drivers
1. To install ADB drivers for your Android device, you need to download PdaNet. PdaNet comes with drivers from all major manufacturers, so it should take care of your drivers installation part. Here’s the download link: Download PdaNet.
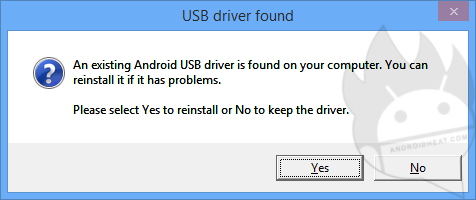
2. Disconnect your device from your computer (do not connect until the process asks you to) and install PdaNet after downloading. Hit “Yes” if the installation process ask you to replace or uninstall existing drivers.
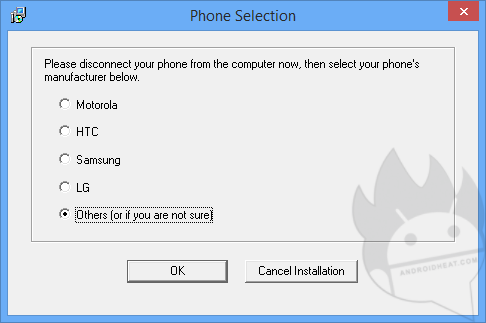
3. On phone selection screen, choose your device manufacturer, it it’s not listed or you’re not sure about it, select “Others”.
4. A scary warning in red will appear telling you that Windows couldn’t verify the publisher of the software. Just click on “Install this Driver Software anyway”. This warning may appear multiple times, keep clicking on install drivers anyway until it stops appearing.
5. When PdaNet will ask you to connect your device in USB debugging mode. Connect your Android device to your computer and let the drivers installation to complete. Once the drivers installation completes, it means you’ve successfully installed ADB drivers for your android device.

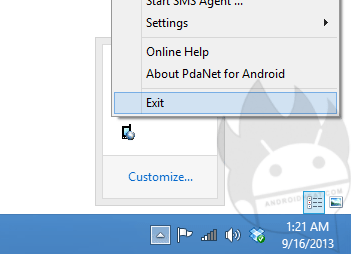
6. Make sure to exit PdaNet from the taskbar. This is just a precautionary measure because PdaNet, running in the background, may interfere with ADB/fastboot commands.
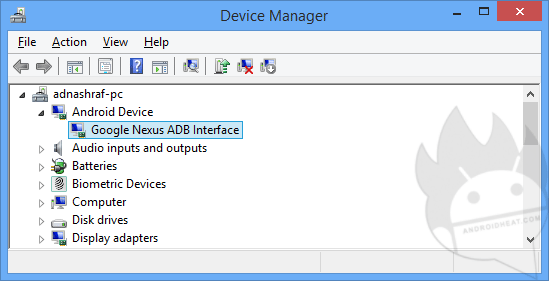
7. To confirm whether the ADB drivers are installed properly or not, connect your device to your computer, open “Device Manager” in Windows Computer and see if there’s any sign of exclamation (!) with any ADB/your device listing. If there’s none, you’re good to go.
How to Setup ADB & Fastboot for Windows
Here’s how to setup ADB and fastboot for your Android devices on computers running Windows OS. This guide doesn’t require you to download complete Android SDK:
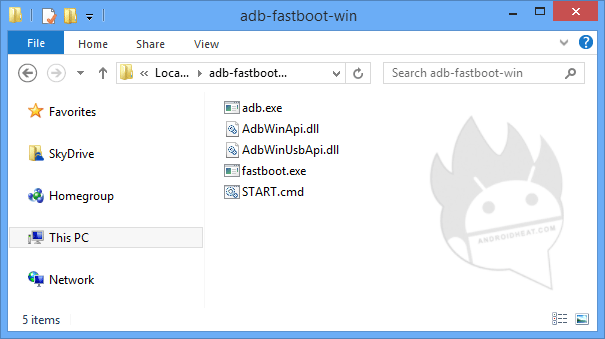
1. To setup ADB and fastboot for Android device in your Windows computer, first you need to download this .zip file: adb-fastboot-win.zip. It contains all the required files for ADB & fastboot (adb.exe, fastboot.exe, AdbWinApi.dll, AdbWinUsbApi.dll), Start.cmd file opens Command Prompt into ADB & fastboot directory.
2. Extract the downloaded adb-fastboot-win.zip file and put the extracted folder wherever convenient in your computer. This is it! You have successfully set up ADB and fastboot for Android in Windows. Now whenever you want to use ADB or fastboot commands, simply run the START.cmd file.
3. To check if ADB is working fine, enable USB debugging mode on you device and connect it to your computer. Now open START.cmd, if Windows prompt, “Run Anyway” the START.cmd file. Now execute the following command:
adb devices
If if return the serial number, then you have set it up successfully and are good to go! Some useful ADB commands can be found at the bottom of this guide.

How to Setup ADB & Fastboot for Mac
Here’s how to setup ADB and fastboot for your Android devices on your Mac running OS X. This guide doesn’t require you to download complete Android SDK:
1. To setup ADB and fastboot on your Mac running OS X, first you need to download this .zip file: adb-fastboot-mac.zip. It contains all the required files for ADB & fastboot (adb.exe, fastboot.exe, AdbWinApi.dll, AdbWinUsbApi.dll).
2. Extract the downloaded adb-fastboot-mac.zip file and put the extracted folder wherever convenient in your Mac computer. While you can ADB and fastboot right away, but you’ll have to navigate the terminal to the folder containing ADB and fastboot files. we will make an entry in ~/.bash_profile configuration files to make ADB accessible from terminal from anywhere.
3. Open Terminal on your Mac and type in the following command:
nano ~/.bash_profile
4. The above command should open the file in a text editor, now add the following line at the end of that file:
export PATH=${PATH}:your_adb_dir
Replace your_adb_dir with the path to the folder containing ADB files (Step 2) e.g. Users/abc/adb-fastboot-mac.
5. Save the files, press CTRL+X to exit, then Y to confirm the save then press enter. It will close the nano editor. That’s it! Now you should be able to use ADB and fastboot commands from anywhere in the Terminal. You can now close the Terminal.
6. To check if ADB is working fine, connect your device in USB debugging mode enabled to Mac computer, open Terminal and execute the following command:
adb devices
If it return the serial number, then you have set it up successfully and are good to go! Below you can find some useful commands for both ADB and fastboot.
Useful ADB commands
Note: to run all these commands, make sure USB debugging is enabled on your device.
adb devices – list all connected devices
adb push – copy file/dir to device
adb pull [] – copy file/dir from device
adb sync [] – copy host->device only if changed
adb reboot – reboot your phone normally
adb reboot recovery – to reboot into recovery
adb reboot fastboot – to reboot fastboot
adb reboot bootloader – to reboot into bootloader
adb install [-l] [-r] [-s] – push this package file to the device and install it
adb uninstall [-k] – remove this app package from the device (‘-k’ means keep the data and cache directories)
adb help – show this help message
adb version – show version num
adb root – restarts the adbd daemon with root permissions
adb shell – run remote shell interactively
adb shell – run remote shell command
Useful Fastboot commands
Note: to run all these commands, your android devices must be in fastboot mode.
fastboot devices – to detect devices in fastboot mode
fastboot flash recovery twrp.img – to flash a recovery called twrp.img (put it in your fastboot folder)
fastboot oem unlock – to unlock bootloader of Nexus devices.
Also checkout:
How to Enable developer options
Great guide.
How to go into recovery when phone not on (ROM installation gone wrong can’t go recovery thru buttons)?
Thks
You’ve bricked it. That means you cannot even turn it on anymore and is essentially a “brick”.
phone is showing modem 1/1 up down problem
but unable to start /boot
i tried minimal adb and fast boot
it show message- error device unauthorized. please check the confirmation dialog on your device.
smartphone micromax canvas xl2(a109)
Pingback: Rooting HTC Desire S, HBoot 2.02, JB 4.1, S-ON | RajArya
aonde eu baixo o programa adb me desculpem mais sou leigo neste assunto ainda mais quero aprender com vcs.. meu razr iu xt890 esta travado na tela com uma escrita deste jeito service required code corrupt como eu posso resolver este problema com o ads será que eu conciga
It still won’t work for me
I downloaded the pdanet and followed put the instructions but when I connected the android device,there was no installion of the drivers which the manual said would be installed,please I need help,someone help pit here
i have install sucessfully
but when i type adb devices oc cmd it is showing unauthorised
i have huawei p8 lite mobile i have 6.0 andriod and i want upgrade my phone to Andriod 7.0 so how can i update my phone and my regin is Middle East so tell me please
Go to Settings>Scroll down>tap Update
than it will atomatically search for updates
hello i have a lgls755 zvb xpower from boost frist having trouble finding a adb download and developer for this device. it has 6.0 mashmollw also haveing prolbes finding the right unlock codes for bootloader and frp please help
I tried installing adb flashboot directly it doesn’t installing only cmd runs(blank) and closes after 2 sec. So pdnet help to cover this prob. Or not?
Wonderful site it’s amazing ADB Drivers by the way i have a site flashing driver
iwant download adb bootloader tools
how are download adb bootloader file